There are multiple ways to invite members to your class, and to manage their account information (such as passwords.) These instructions assume you have already created a class. If you need instructions on how to create a class, please click here.
Adding Students
If you have not yet added any students to your class, you'll see the following when you enter your class from the CK-12 dashboard:
Click the Add Students button.
Alternatively, if you *do* already have students in your class, and want to add more, click Members in the left navigation area, then click the Add Students button:

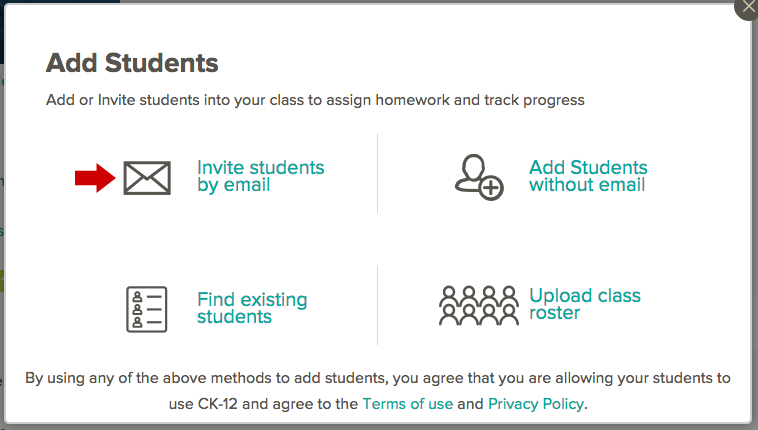
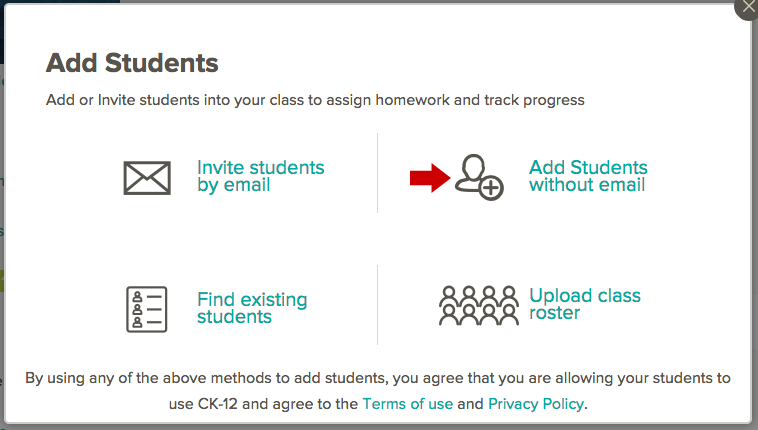
You'll have three options, as described in the sections that follow.
Invite Students by Email
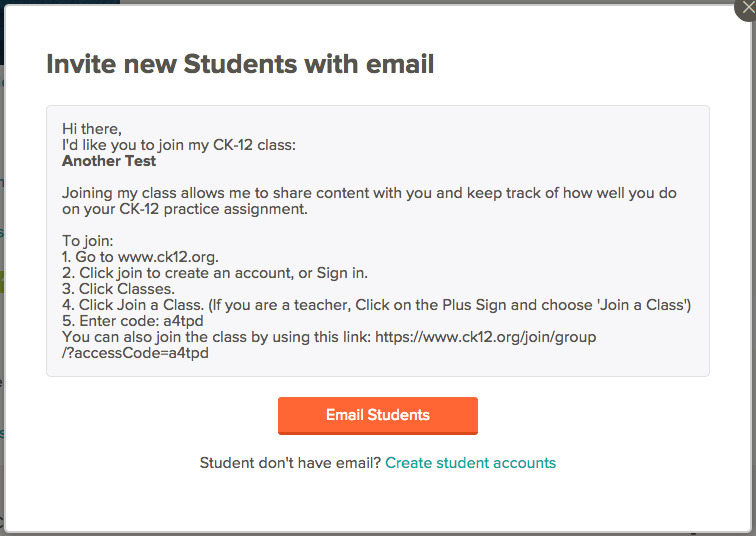
You can send the code that students will use to join your class via email. Students must have a CK-12 account to join your class, so this option usually applies to students who are 13 or older, and who have their own email address.
Note: Students under 13 cannot create their own CK-12 accounts. If your students are under 13, and do not already have a CK-12 account that was set up by a parent or another teacher, please use the "Create New Accounts" option described in the next section, instead of inviting them by email. You are also welcome to use that option for older students who might not have an email address, or if you have several students to set up at once.
- Click the "Invite students by email" button.

- In the next dialog, click the "Email Students" button.

- This will launch the default email program on your computer, and populate a new email with the template above. You can then enter email addresses for your students, and send the email.
Create New Accounts
This method is recommended if:
- Your students are under 13, and do not already have a CK-12 account that was set up by a parent or another teacher.
- Your student is older but does not have an email address, or a CK-12 account that was set up by a parent or another teacher.
- You have several students to set up at once.
- You are a parent setting up a CK-12 account for your child. (Click here for more details.)
- Click the "Create account" button.

- Enter the student's name, username of your choosing (this cannot be changed later), and a password of your choosing. Note, that there is no option to download or print the roster once it is created. If you need to record these, you should do so in another document of your choosing.
- To add additional students, click the Add button in the next row. Once you have finished adding students, click the "Create" button.

- You'll see a dialog confirming the accounts you've created, and instructions reiterating that you should record these accounts if you will need to refer back to them. Clicking the "View Students" button takes you to your class' Members page.

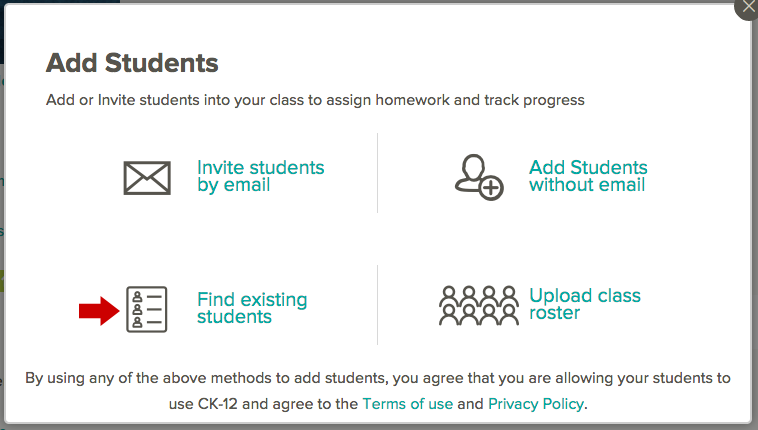
Add Students From Your Other Classes
This option allows you to add students who are already members of other classes you own. Note, you can only use this option with CK-12 accounts that you created.
- Click the "Add Students" button.

- Select any student that isn't already a member of this class. In the example below, John Doe is a member of another class you own, but not this class. Check the box next to his name to add him to this class.

- You can select one, or multiple students, then click the "Add" button.
Changing Passwords and Updating First & Last Names
- Click Members in the left navigation area of your class.
- Locate the student you want to update, and click the elipsis (three dots) icon to the right of their name.
- Click "Edit Account."

- In the next dialog box, you can update the user's first and last name by typing in the new information and clicking Save. Note, that usernames cannot be changed.
- To change a user's password, hover over the "i" icon in the password field, then click the "reset the password" link in the small box that appears.

- Enter the new password, and click the "Save" button. (You can also click the "Discard changes" link, or the "Show password" link under the password entry box, if needed.)

Removing Class Members
- Click Members in the left navigation area of your class.
- Locate the student you want to update, and click the elipsis (three dots) icon to the right of their name.
- Click "Remove"

- Click "Remove" on the confirmation dialog box that appears. (Or click "Cancel" if you have changed your mind.)
